Best Tesla Model Y Center Console Organizers of 2022 - TALSEM
Customize your Tesla with the best Tesla Model Y Center Console Organizers. ✓ Easy Installation ✓ Trusted by 1K+ Owners
Store your Dashcam and sentry mode footage to protect your Tesla
Without a hard drive, you won’t be able to record your dashcam and sentry mode footage. These 2 main features of your Tesla actually need an external flash drive to deliver their full potential. Recording footage can become very handy in case of an accident or theft and therefore save you money and time if you encounter unfortunate events.
Preformatted, no set up required: Just plug & play
Talsem has preformatted this hard drive for you to simply plug it in your Tesla to start recording. No additional formatting or configuration is required. When using your generic USB drive, you may have to format it in FAT32 by yourself and potentially lose your old data. We recommend having a dedicated flash drive to stay in your car at all times and be ready to record at all times.
As we never know when visioning your footage will be necessary, our Tesla USB drive comes with 128GB of memory to store several days or recordings.
You don’t need to empty your usb drive, when it is full, your new dashcam and sentry mode recording will override the old ones.
Built to resist over time and extreme temperature
With the High-quality microchips configuration, our Tesla flash drive works in exceptionally cold and high temperatures, with no loss of any fragment, anywhere you go. The built-in microchip is highly durable.
It holds against a great amount of heat, which is ideal for in-car environments and also continuous recording.
Packaging Includes
1 USB A Preformatted Flash Drive
Specs
Memory: 128GB
Writting speed: Up to 120MB/s
Reading speed: Up to 220MB/s
Compatibility
Compatible with Tesla Model 3, Model X, Model Y, and Model S
FAQ
Do you need a USB for Sentry Mode?
As you need an external flash drive in order to record your Sentry mode footage, Talsem provides a tailored USB drive for your Tesla with the ideal capacity (128GB), durable hardware to handle extreme temperature, and continuous recording.
How do I format a Tesla dashcam USB?
While you can format a USB drive by yourself, this procedure is not required for our Tesla flash drive. Taslem has preformatted it for you to just plug it and start recording.
Where is the USB in Tesla?
You can find USB ports in the center console of your car or, for more recent models, in the glove compartment. You can plug your Talsem USB drive in any of the USB A port. It is also compatible with our USB Hub USB A data ports.
Custom Designed - Easy to Grab
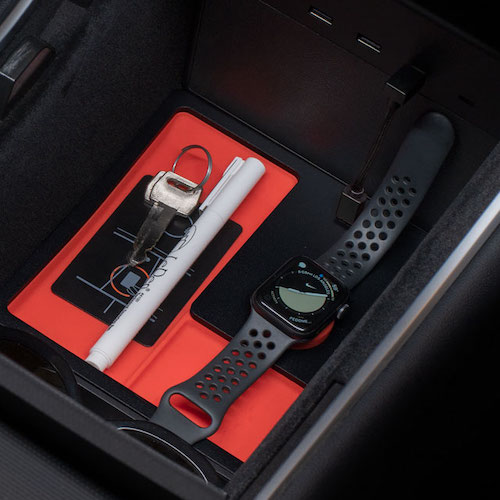
Custom cut and molded specifically for the Tesla model 3 and model Y, this accessory will smoothly integrate with your center console, giving an OEM feel. Its shape makes it easy to place and grab your key card, making you forget that it is even here. Isn’t it what we expect from accessoires?
Essential Accessory
Our Tesla key card holder stops cards from sliding during turns or acceleration and it’s a great place to put the card when using valet parking. Its purpose is also to get rid of some frictions in your daily life, having a dedicated spot for your key card will prevent you from searching your pockets or your center console.
Easy to Install - No Drill Required
1 minute install thanks to its double sided tape solution, no tools required!
Material
Made from silicon, our Tesla key card holder is resistant and prevents your key card from getting scratched.
Colors
Black
Packaging Includes
1 Tesla key card holder
Compatibility
Compatible with Tesla model Y and Tesla Model 3.
Keep your eyes on the road and drive safer.
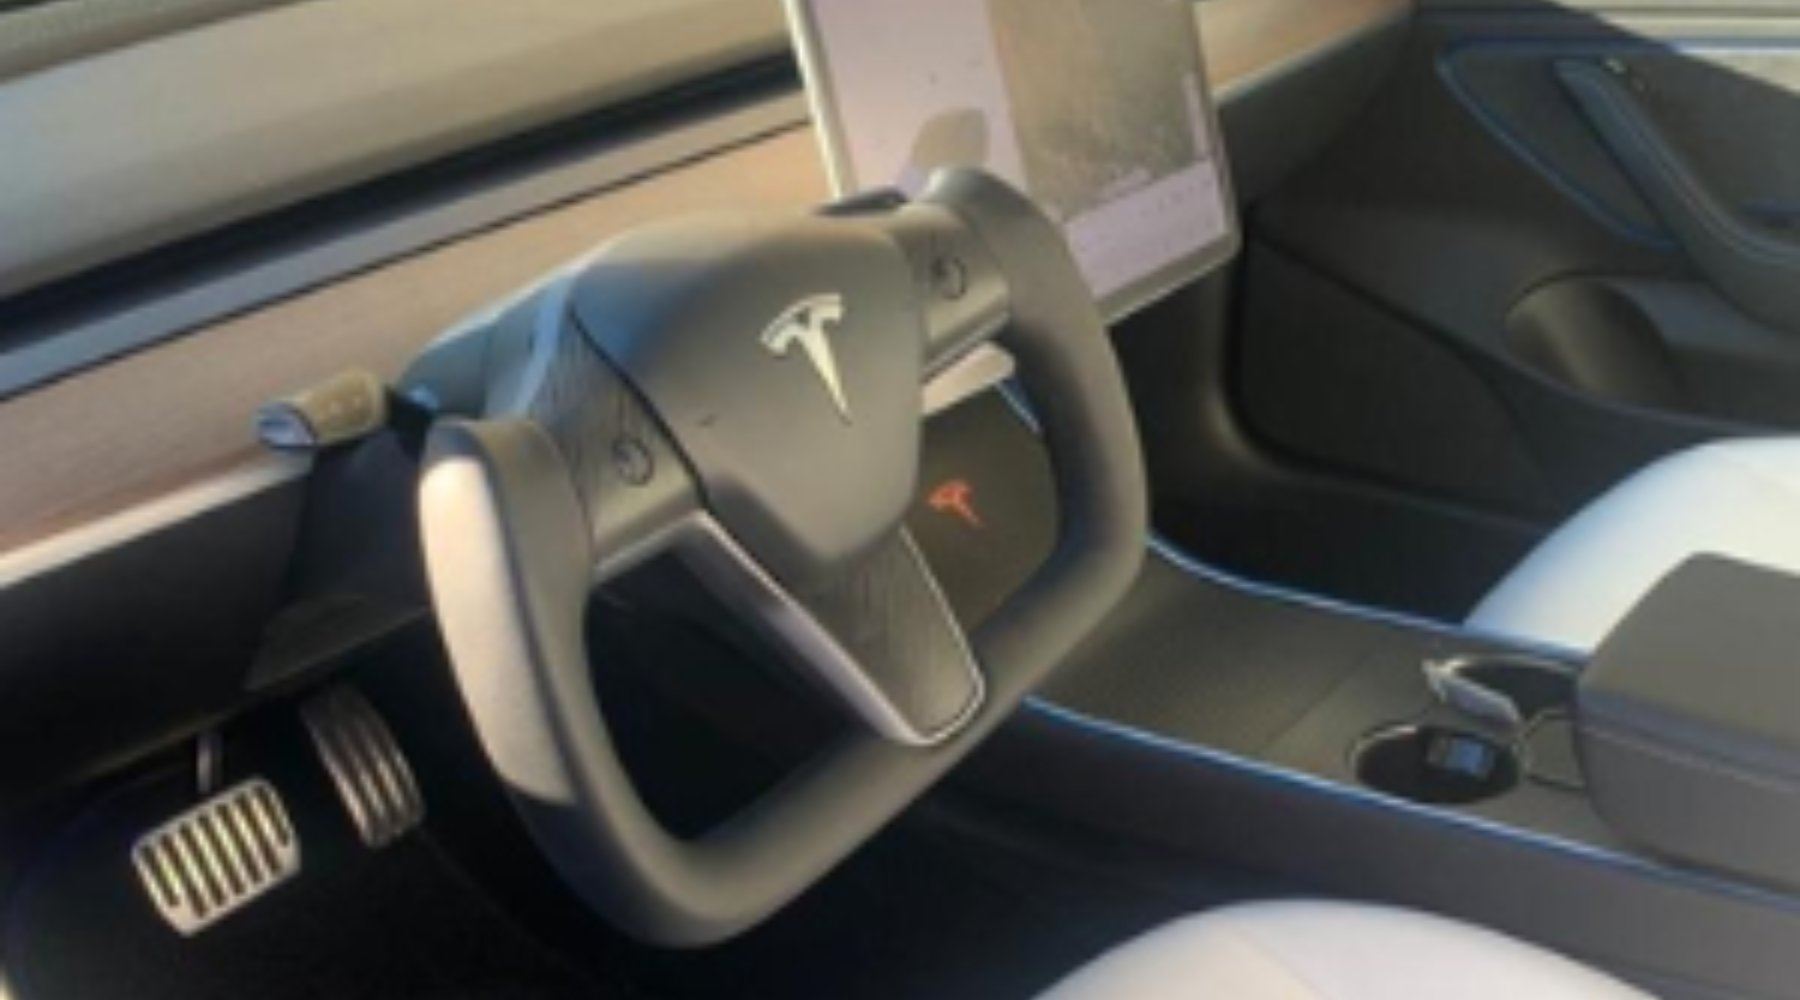
Have you ever driven a Tesla Model 3/Y and wondered whether your blinker is on/off the current speed limit or the remaining range? Now you can see it right on a 10.25 inch HD display directly behind the steering wheel.
This Tesla heads-up display (HUD) keeps you safely informed and connected to your car's vital statistics while on the road. It also reduces driver distraction by discreetly informing you of key vehicle information instead of forcing you to take your eyes off the road to look at the center console screen.
Blends in perfectly with the Tesla interior.
If you have seen heads-up displays before and felt that they were standing out too much from the rest of the Tesla interior. You are going to love our product!
It’s custom-made to blend seamlessly with the interior of your Tesla Model 3/Y. It can be operated by the steering wheel control, letting you easily switch songs, channels and adjust volume, providing you with a safer and more enjoyable journey.
The automatic adjusting brightness levels also make sure it's never brighter or dimmer than it needs to be. As the ambient brightness varies, the UI interface switches between white and black UI modes according to the time of day.
Thanks to our advanced integrated HUD, it doesn't just enhance the look, but you will benefit from a safer ride.
Innovative triple-layer structure for maximum safety and comfort.
Featuring an Android 9 operating system with 4 gigabytes of RAM and 32 gigabytes of storage.
Its powerful hexa-core processor will ensure a hiccup-free experience. You can view original vehicle radar information on its crystal clear 10.25 inches HD IPS screen.
Packaging Includes
One Integrated head's up display (HUD) for Tesla Model 3/Y made in year 2018-2021 (Intel infotainment system), include with all necessary wiring
Specifications
OS: Android 9
Display: 10.25 inches 1920*720P IPS screen
Connection: USB
Control Method: Car steering wheel buttons
Languages: Support Multi-language
Memory: RAM 4GB ROM 32GB
Note: No GPS navigation, Not support Android Auto (No Carplay)
Material
ABS, in two color options: White and Matte Carbon Fiber
Compatibility
Compatible with Tesla Model 3 and Y that are configured with Intel infotainment processor
Installation Guide
For your convenience, the PDF version of this installation guide is available here.
Tools you will need to complete the installation
Screwdriver
Pry tool
Estimated Time: 1.5H
Installation Summary:
Step 1: Remove the side caps
Step 2: Remove the cover above the foot space on the passenger side
Step 3: Remove the original wire and install the HUD adapter
Step 4: Assemble your HUD
Step 5: Remove your OEM Dashboard cover
Step 6: Plug your HUD and arrange the wiring
Step 7: Assemble your HUD to your dashboard
Differences between 2021 Model 3 / Y installation and older models
Step 1: Remove the side caps
Picture 1
Picture 2
The first step consists in removing the 4 parts (picture above) that you will find on each side of your Tesla dashboard.
Remove the triangular looking plastic cap (see picture 3) with your pry tool. On Picture 4, you can see how it looks once removed. As you may see on picture 2, this part is connected to your dashboard by 3 little attachments. Please remove them one by one using your pry tool to avoid damaging the cap. Repeat this process for both sides of your dashboard.
Now you can remove the upper small cap (see picture 3 and 4). On picture 5, you can see how it looks after removal. Repeat this process for both sides of your dashboard.
Picture 3
Picture 4
Picture 5
Step 2: Remove the cover above the foot space on the passenger side
Remove the cover above the foot space of the passenger's seat (see picture 6). Use your screwdriver to remove the screw on the right side and your pry tool to remove the 2 plastic attachments. (See picture 7).
From here, you will have to use your pry tool to remove the cover (See picture 8) in order to access the wires under it. Use your pry tool gently and pull the cover towards the seat in order to remove it. On picture 9, you can see how it looks once the cover has been removed.
Remove the two plugs at the back of the lower cover and remove the small caps covering them as shown on picture 10 and 11.
Picture 6
Picture 7
Picture 8
Picture 9
Picture 10
Picture 11
Step 3: Remove the original wire and install the HUD adapter
Note: The 16pin plug indicated by the red arrow in picture 12 is the power supply plug, the 12Pin male plug indicated by the yellow arrow is the processor, and the 12Pin female plug indicated by the green arrow is the adapter plug (insert the original plug removed in step 2 from the on this adapter plug).
Picture 12
Connect the wiring with the original vehicle processor to form a connection.
Separate the gray white male and female plugs indicated by the arrow in Figure 13 (as shown in Figure 14) There is an anti-detaching buckle in the middle of the male end. When pulling out the plug, you need to press and hold the anti-detaching buckle to pull the plug out. In order to prevent any damage on your original wire, don’t use force, just make sure to press firmly the anti-detaching mechanism while pulling.
The 12Pin male plug indicated by the red arrow in picture 15 is inserted into the position indicated by the red arrow in picture 17, and the yellow one in picture 16. The 12Pi male socket indicated by the colored arrow is inserted into the 12Pin female socket indicated by the yellow arrow in picture 15. On picture 17, you can see how it is supposed to be once this operation is done.
Insert the unique 20pin male plug on the harness in picture 18 into the position indicated by the yellow arrow in picture 19. Picture 20 shows you how it looks once the process is completed.
Picture 13
Picture 14
Note: When installing the wiring harness, pay attention to the direction of the plug and insert it correctly. Make sure that it stays in place to avoid any loosening, Otherwise it may cause a malfunction of the central control panel display.
Picture 15
Picture 16
Picture 17
Note: When installing the wiring harness, pay attention to the direction of the plug and make sure it is in place. Please avoid any loosening, otherwise, the product may not work or could get damaged. After completing the above steps, the remaining 16pin male and typ-a bus harness can be put aside.
Picture 18
Picture 19
Picture 20
Step 4: Assemble your Head’s Up Display
Let’s assemble the HUD as shown in picture 21 and 22, by using the two parts in picture 21 and the attaches in picture 2.
Note: We recommend you to wear gloves during the installation to prevent damaging the product or your Tesla.
Picture 21
Picture 22
Assemble the two parts shown in picture 21 following the way shown in picture 23. To do so, please align the holes from the right part with the left piece and clip them together (as shown on picture 24)
After completing the actions described above, turn the product over to make the front of the HUD face up as shown on picture 26 and clip the piece shown on picture 22. After aligning the piece with the holes, press tightly.
After completing the actions described in B. you should get the result shown on picture 27.
Picture 23
Picture 24
Picture 25
Picture 26
Now, turn the product over slightly, as shown in picture 28 and take out the Pb 3 * 8mm screw from the packing box and screw it into the position indicated by the red arrows in picture 28.
The position indicated shall be locked tightly and firmly. Please use only 4 screws provided in the packaging. Using screws not provided by TALSEM may cause irreversible damage to the product.
Picture 27
Picture 28
Picture 29 shows that the fixing screw is tightened and locked.
Picture 30
Step 5: Remove Your OEM Dashboard Cover
Lift the part indicated by the red arrow in picture 31 from left to right along the gap indicated by the green arrow. Then lift the part vertically 5cm-7cm from the lifting edge (gap edge), and extend four fingers into the part at the bottom. Then push the decorative panel to the horizontal direction with your fingertips, and then pull out the dashboard toward the decorative panel( The instrument decorative panel is fixed on the framework of the instrument assembly by 14 loading clamps.)
Remove the spring clip indicated by the red arrow in picture 31 and install it in the same position as the instrument (as shown in picture 34),
Picture 31
Picture 32 shows what the dashboard looks like after the cover removal.
Note: In the process of removal, the buckle may be extruded inward, resulting in insufficient clamping force. The shrapnel should be slightly expanded outward before the clip is removed and installed into the buckle of the instrument.
Picture 33
Picture 34
Step 6: Plug your Head’s Up Display and arrange the wiring
Note: to complete this step, it is necessary to take protective measures to avoid product damage potentially caused by scratching the surface of your HUD.
Insert the 16pin male plug (Ref picture 35 & picture 36) as indicated in picture 36, pay attention to the direction when inserting. Make sure that it is inserted in place and that the anti-dropping buckle works normally.
After step A is done, check that the HUD On/Off function responds correctly.
Once you have checked that the HUD displays function well by turning it on and off, it is time to arrange the wiring in order to be able to place your HUD properly on your dashboard and avoid any unnecessary gap and make sure that your HUD is attached firmly. Arrange the cable as shown on picture 37 and 38.
Picture 35
Picture 36
Picture 37
Picture 38
Step 7: Assemble your HUD to your dashboard
After arranging the cable as instructed in step 6, let’s install the HUD onto your dashboard as shown on picture 39 and 40. After checking that all the clips are aligned correctly, please press and tap the surface of your HUD panel against the edge of the steering wheel and the air conditioning. You should start from the driver side and move along to the front passenger side. Picture 41 and 42 show you the final product once the installation is completed!
Picture 39
Picture 40
Picture 41
Picture 42
Differences between 2021 Model 3 / Y and older models
Difference 1: The differences between the 2021 model 3/Y and older models are shown by the yellow arrow in picture 43. For 2020 model 3 /Y and before, the component indicated by the yellow arrow is detachable while for the 2021 Model 3/Y it is not. Therefore, it is unnecessary to try to remove them during installation.
Picture 43
Difference 2: The second difference between the 2021 Model 3/Y and older models is shown by the green arrow in picture 44. The clips to attach your HUD to your dashboard are different. The green arrow on picture 44 shows how the clips look like on the Model 3/Y from 2020 and before while picture 45 shows you how the clips are designed on Model 3/Y from 2021.
Picture 44
Picture 45
Now let’s take a look at what these differences mean during the installation process.
Difference 1: Installation Method
If you are installing the HUD on a 20211 Model 3/Y, it is not necessary to remove the parts indicated by the yellow arrow in picture 46.
The parts can be directly clipped to your HUD trim panel via its connectors as shown by the green arrow in picture 47.
Picture 46
Picture 47
Difference 2: Installation Method
If you are installing your HUD on a 2021 Model 3/Y, it is necessary to remove the two screws of the components indicated by the yellow arrow in picture 48. Then, remove the interchangeable plastic clips installed on the product (6 in total), and then find the components shown in picture 49 inside the packaging box of your HUD to replace them.
Picture 48
Picture 49
FAQ
Why do I need the integrated head's up display (HUD) for Tesla Model 3/Y when I already have the center console display?
We are coming up with a brand new system that gives you the information you need without ever removing your eyes from the road. Unlike other HUDs, ours is completely integrated and keeps the look on your Tesla's dashboard.
What sort of information can this HUD show?
This integrated head's up display (HUD) for Tesla Model 3/Y can show all the information you’ll ever need when driving. Here is some of the real-time driving information it can show the display:
Vehicle speed,
Temperature,
Gear position,
Remaining range,
Turning light,
Gear position,
High and low beam,
Driving distance, and more
It can also show vehicle status information, including:
Car lights
Door opened or closed
Tire pressure, and more
How good is the display?
The integrated head's up display (HUD) for Tesla Model 3/Y comes with a best-in-class 10.25 inch HD display with a crisp 1920* 720-pixel resolution. Instead of a cheaper and more conventional TFT screen, it uses the latest IPS technology to offer you the best glare-free display.
Since this display will be in front of you all the time, we have also taken steps to ensure no damage is done to your eyes. We have got a built-in blue-light filter in the screen to make the colors softer and easier on the eyes, helping you avoid eye fatigue and damage in the long run.
The display also automatically adjusts its brightness level, so it’s never too bright or too dim. Moreover, the advanced IPS technology eliminates any screen flickering, so your eyes get tired less, and lets you enjoy a more comfortable viewing.
Can I use the integrated head's up display (HUD) for Tesla Model 3 and Y with Tesla Model S or X?
We developed our integrated Head's up display (HUD) specifically for the Tesla Model 3 and Y in order to provide the best fit and performance possible. Due to the difference in-dash sizes and wiring systems, other Tesla models will not fit.
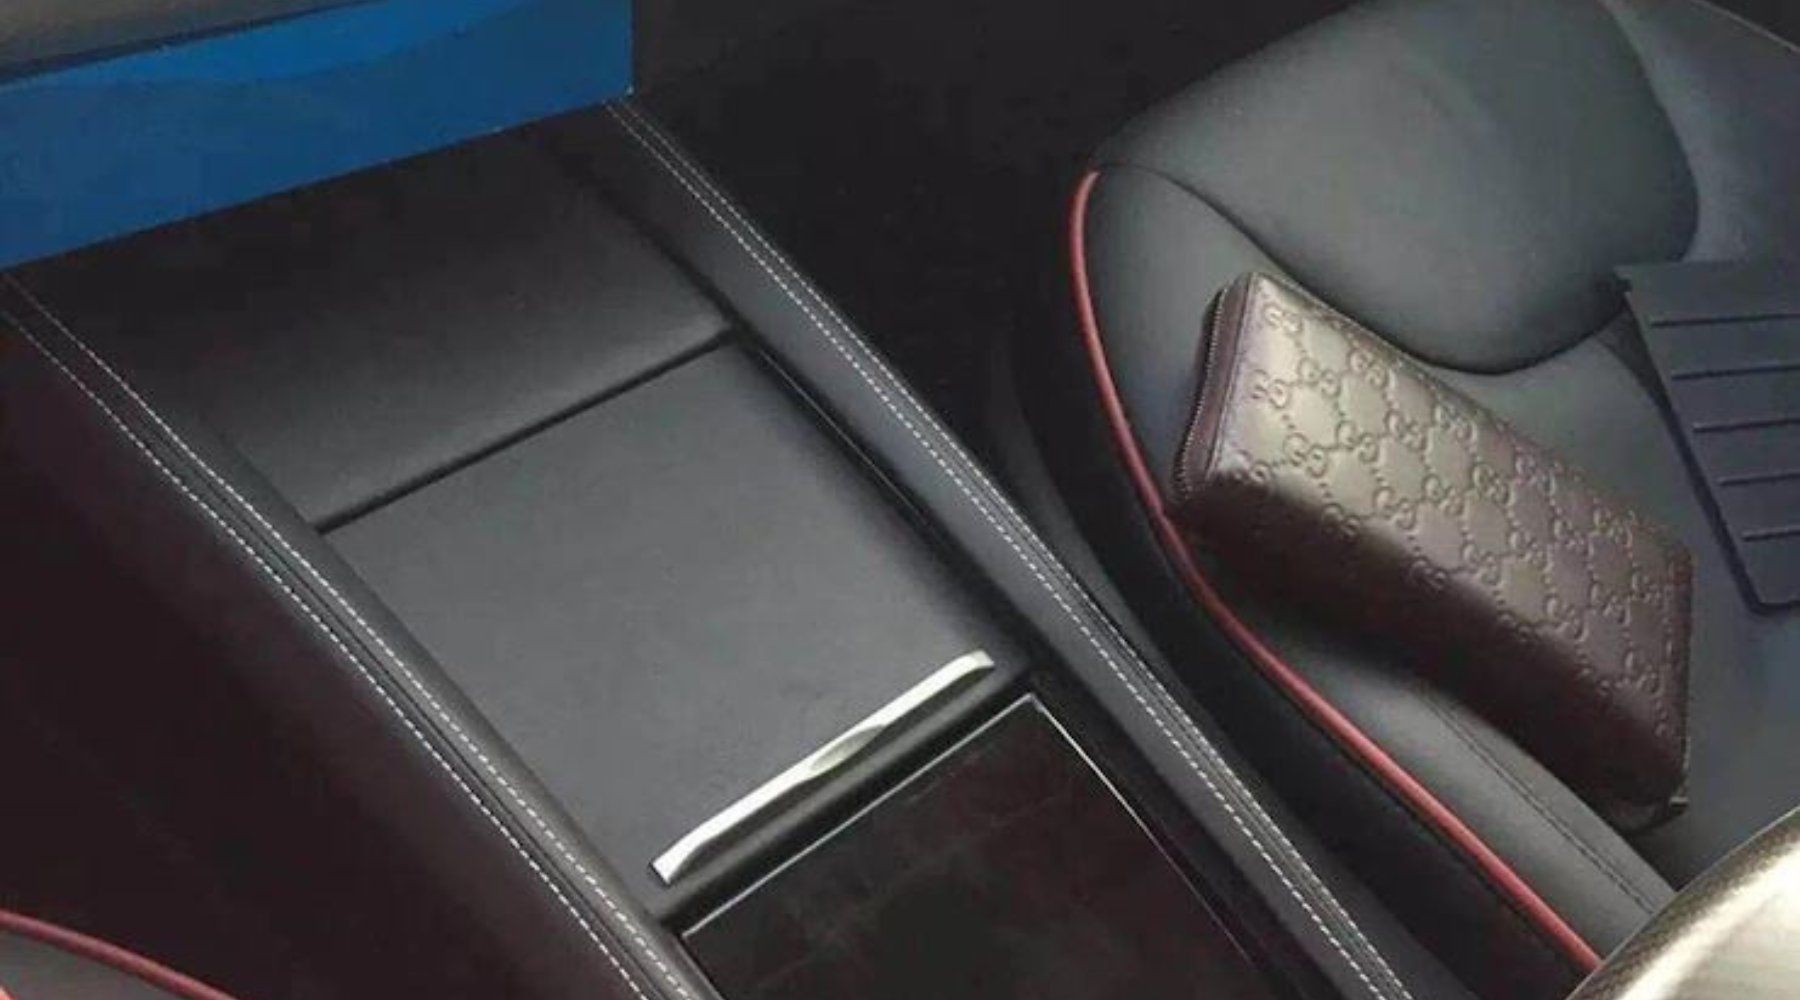
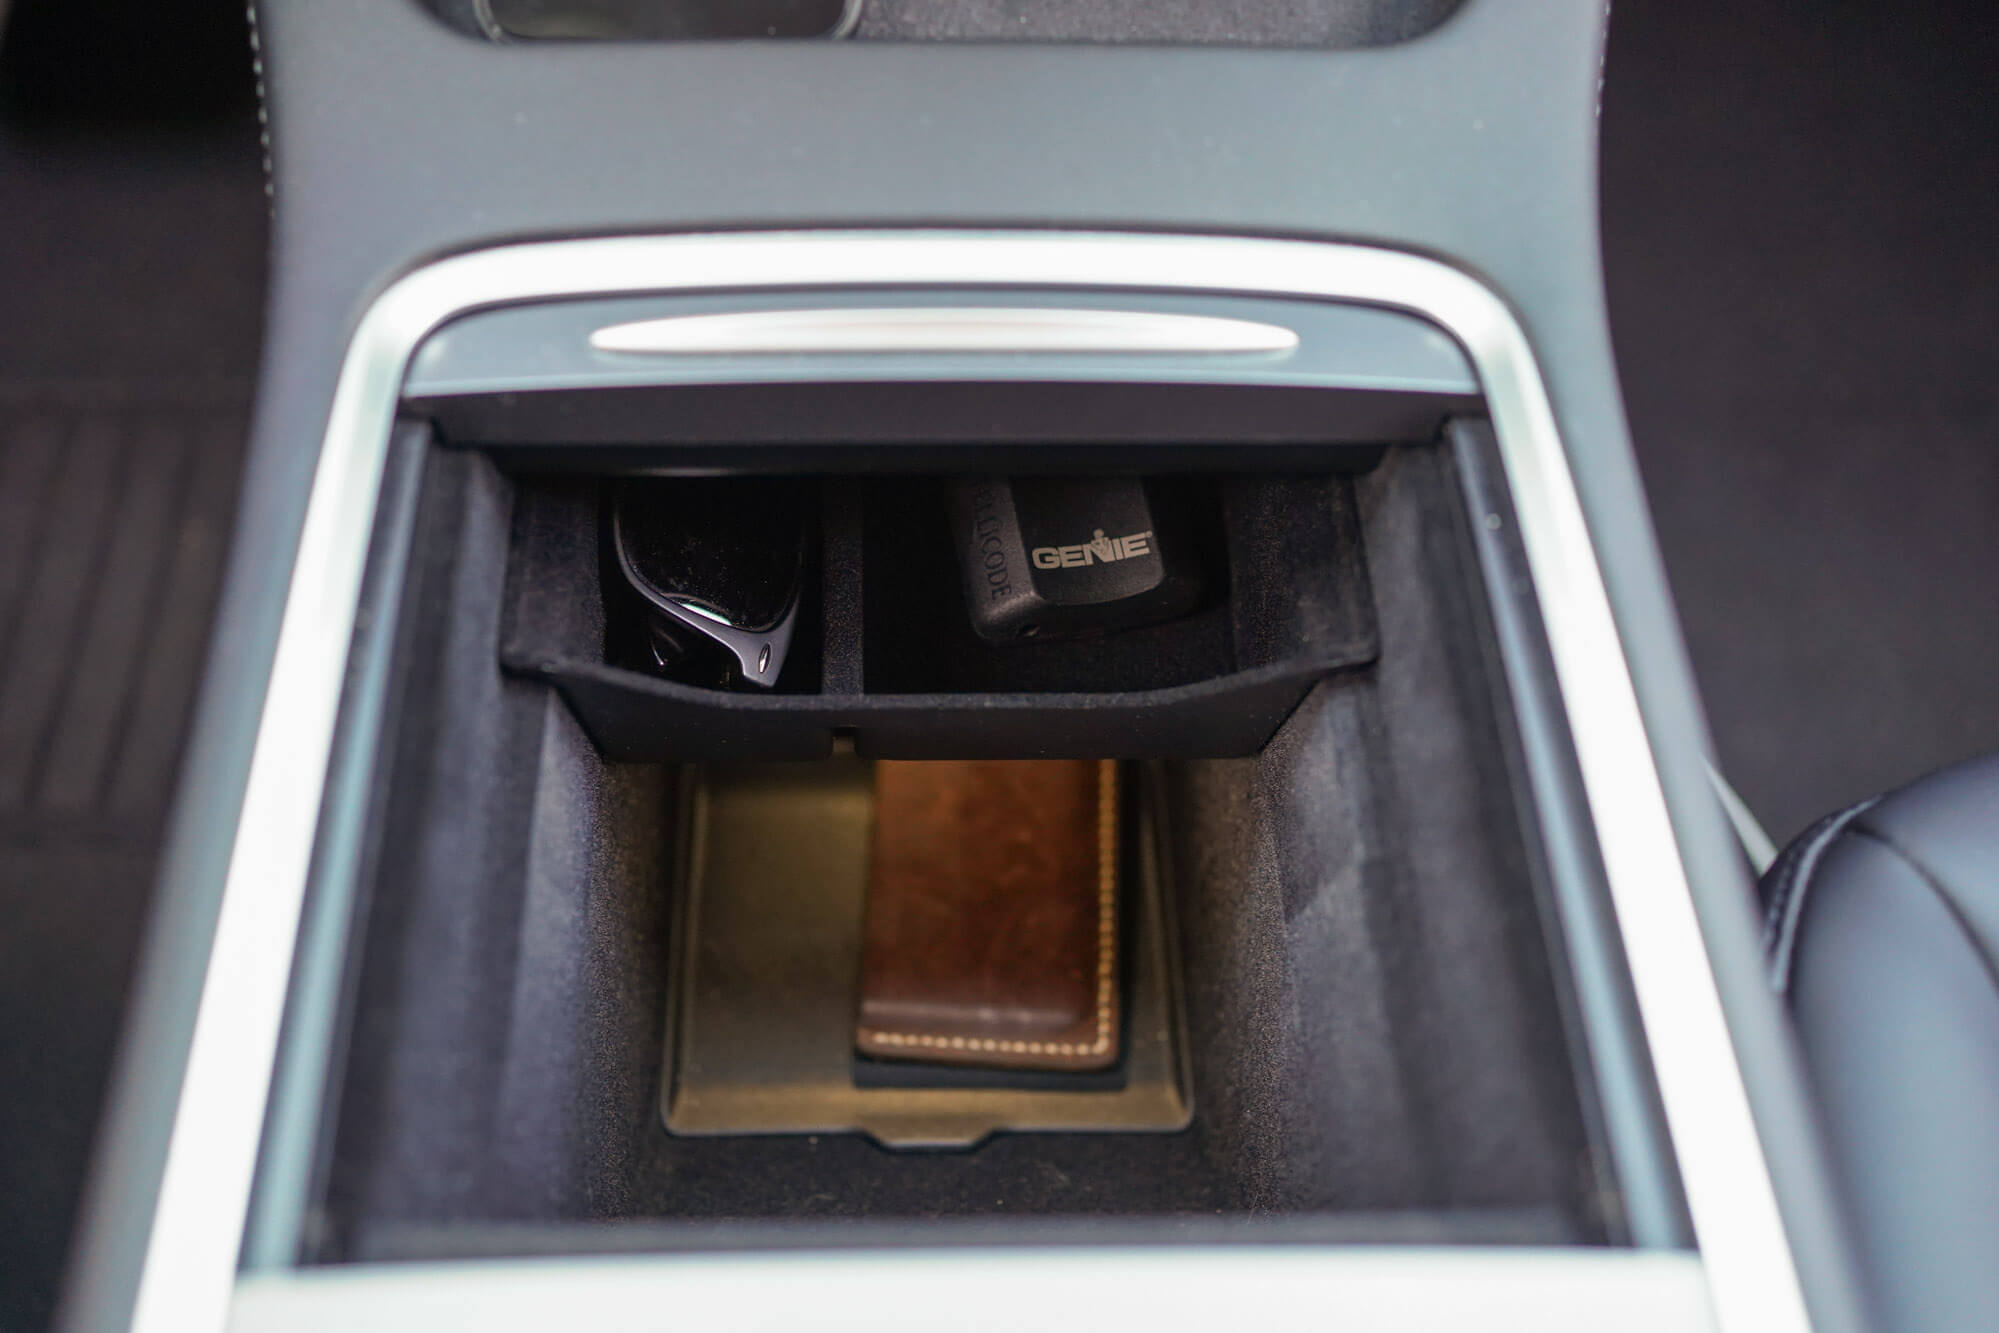
Get More Storage Space
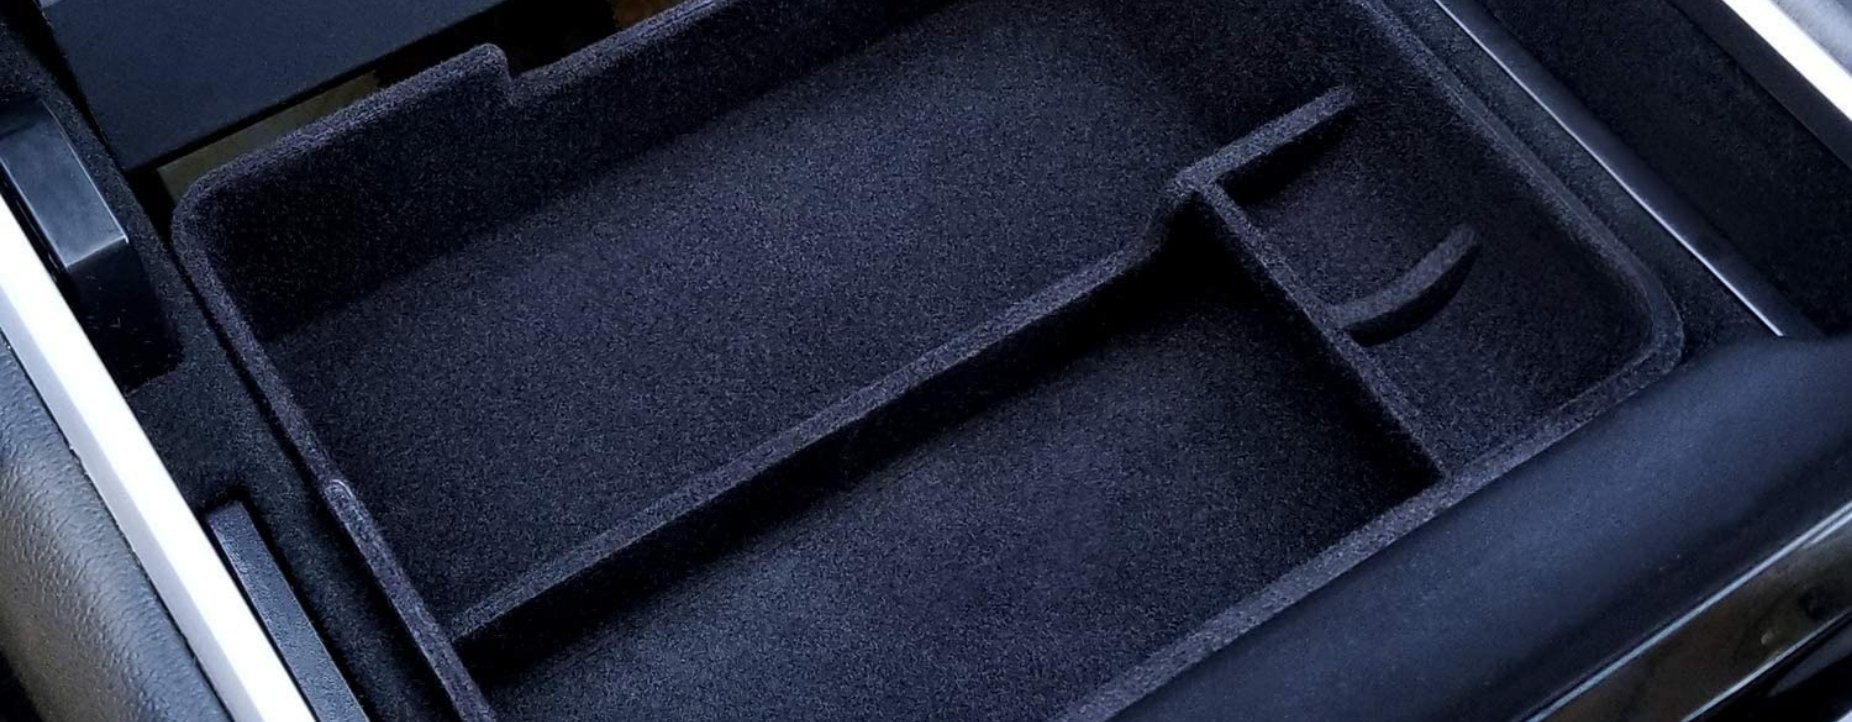
This is our second-generation tray, bringing a touch more room for Qi charging pads, and also allows the center console light to shine through the rear of the tray, allowing you to simply see inside. We also added a handy little shelf to carry a pen.
Our center console organizer creates a second row of storage within your console, allowing you to separate items where you need a quick access from items that you don't need as often.
Optimize Your Space
The Tesla Model 3 & Y includes a deep front storage space, the organization is sort of limited, and items stacked above each other in a messy way.
With our organizer, no more digging through your center console like an animal, now you'll be able to just pull out what you need without taking your eyes off the road. No more pens, glasses, lip balm, etc rolling around!
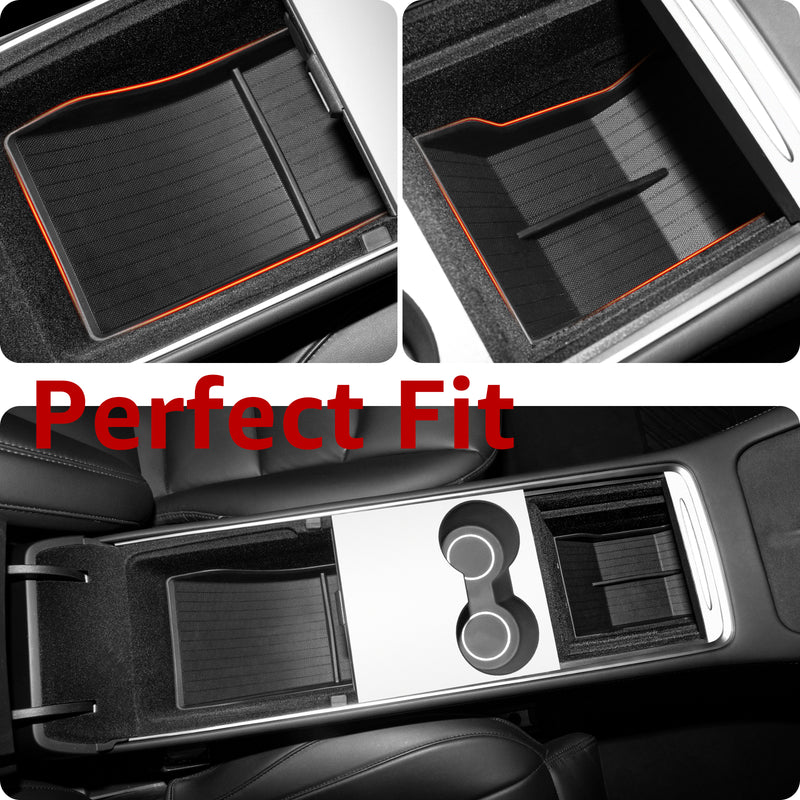
Custom Designed for Tesla Model 3 and Model Y
A custom design with a simple installation. Snug fit and nice finish, it will give you an OEM feel and won't rattle around. You can still cover your items with the console lid still, after our adding our organizing tray, you can still close your console with the lid.
Installation
Easy installation and removal
Material
Light and durable ABS plastic.
Color
Black.
Compatibility
Tesla Model 3 and Tesla Model Y in 2021-2022
Basenor Tesla Model Y Model 3 Center Console Organizer Tray TPE Contro
VICSEED's Tesla Model 3/Y Console Organizer is the ultimate accessory for any Tesla owner looking to keep things organized and tidy.

Vicseed Tesla Center Console Organizer【Perfectly Tidy】 Tesla Model 3/Y Console Organizer Tray with Silicone Protection, Light Translucent Tesla

KUNIST 2023 Upgraded Model 3 Model Y Center Console Organizer Tray Armrest Storage Box for 2023 2022 2021 Tesla Accessories (Black) : Automotive
Fitting all 2020-2023 models. It provides additional storage space to keep your back seat organized. The storage box features an extra row of space, which can be used to store small items or even serve as a trash can. The lid could be used as a tissue holder to keep your car clean and tidy, improving the riding experience for passengers. Installation is easy and straightforward, with a Velcro position reserved on the back for quick, tool-free installation in just 30 seconds.

OtriFowd Rear Center Console Organizer Behind Seat for Tesla Model Y 2023 2022 2021
The 20 Best Tesla Model Y & 3 Accessories (And Which to Avoid)
Best Tesla Model Y Organizer Accessories of 2022 from $15 - TALSEM

Center Console Organizer Tray 3PCS For 2021 2022 2023 2024 Tesla Model Y And 2021 2022 2023 Tesla Model 3 Interior Automotive Accessories Flocked Car Organizer Armrest Hidden Cubby Drawer Storage Box : Automotive
Best Tesla Model S Steering Wheels of 2022 - TALSEM
Best center console organizers for Tesla vehicles

KUNIST 2023 Upgraded Model 3 Model Y Center Console Organizer Tray Armrest Storage Box for 2023 2022 2021 Tesla Accessories (Black) : Automotive